Modern Concrete and Wood Bench
Step-By-Step Instructions
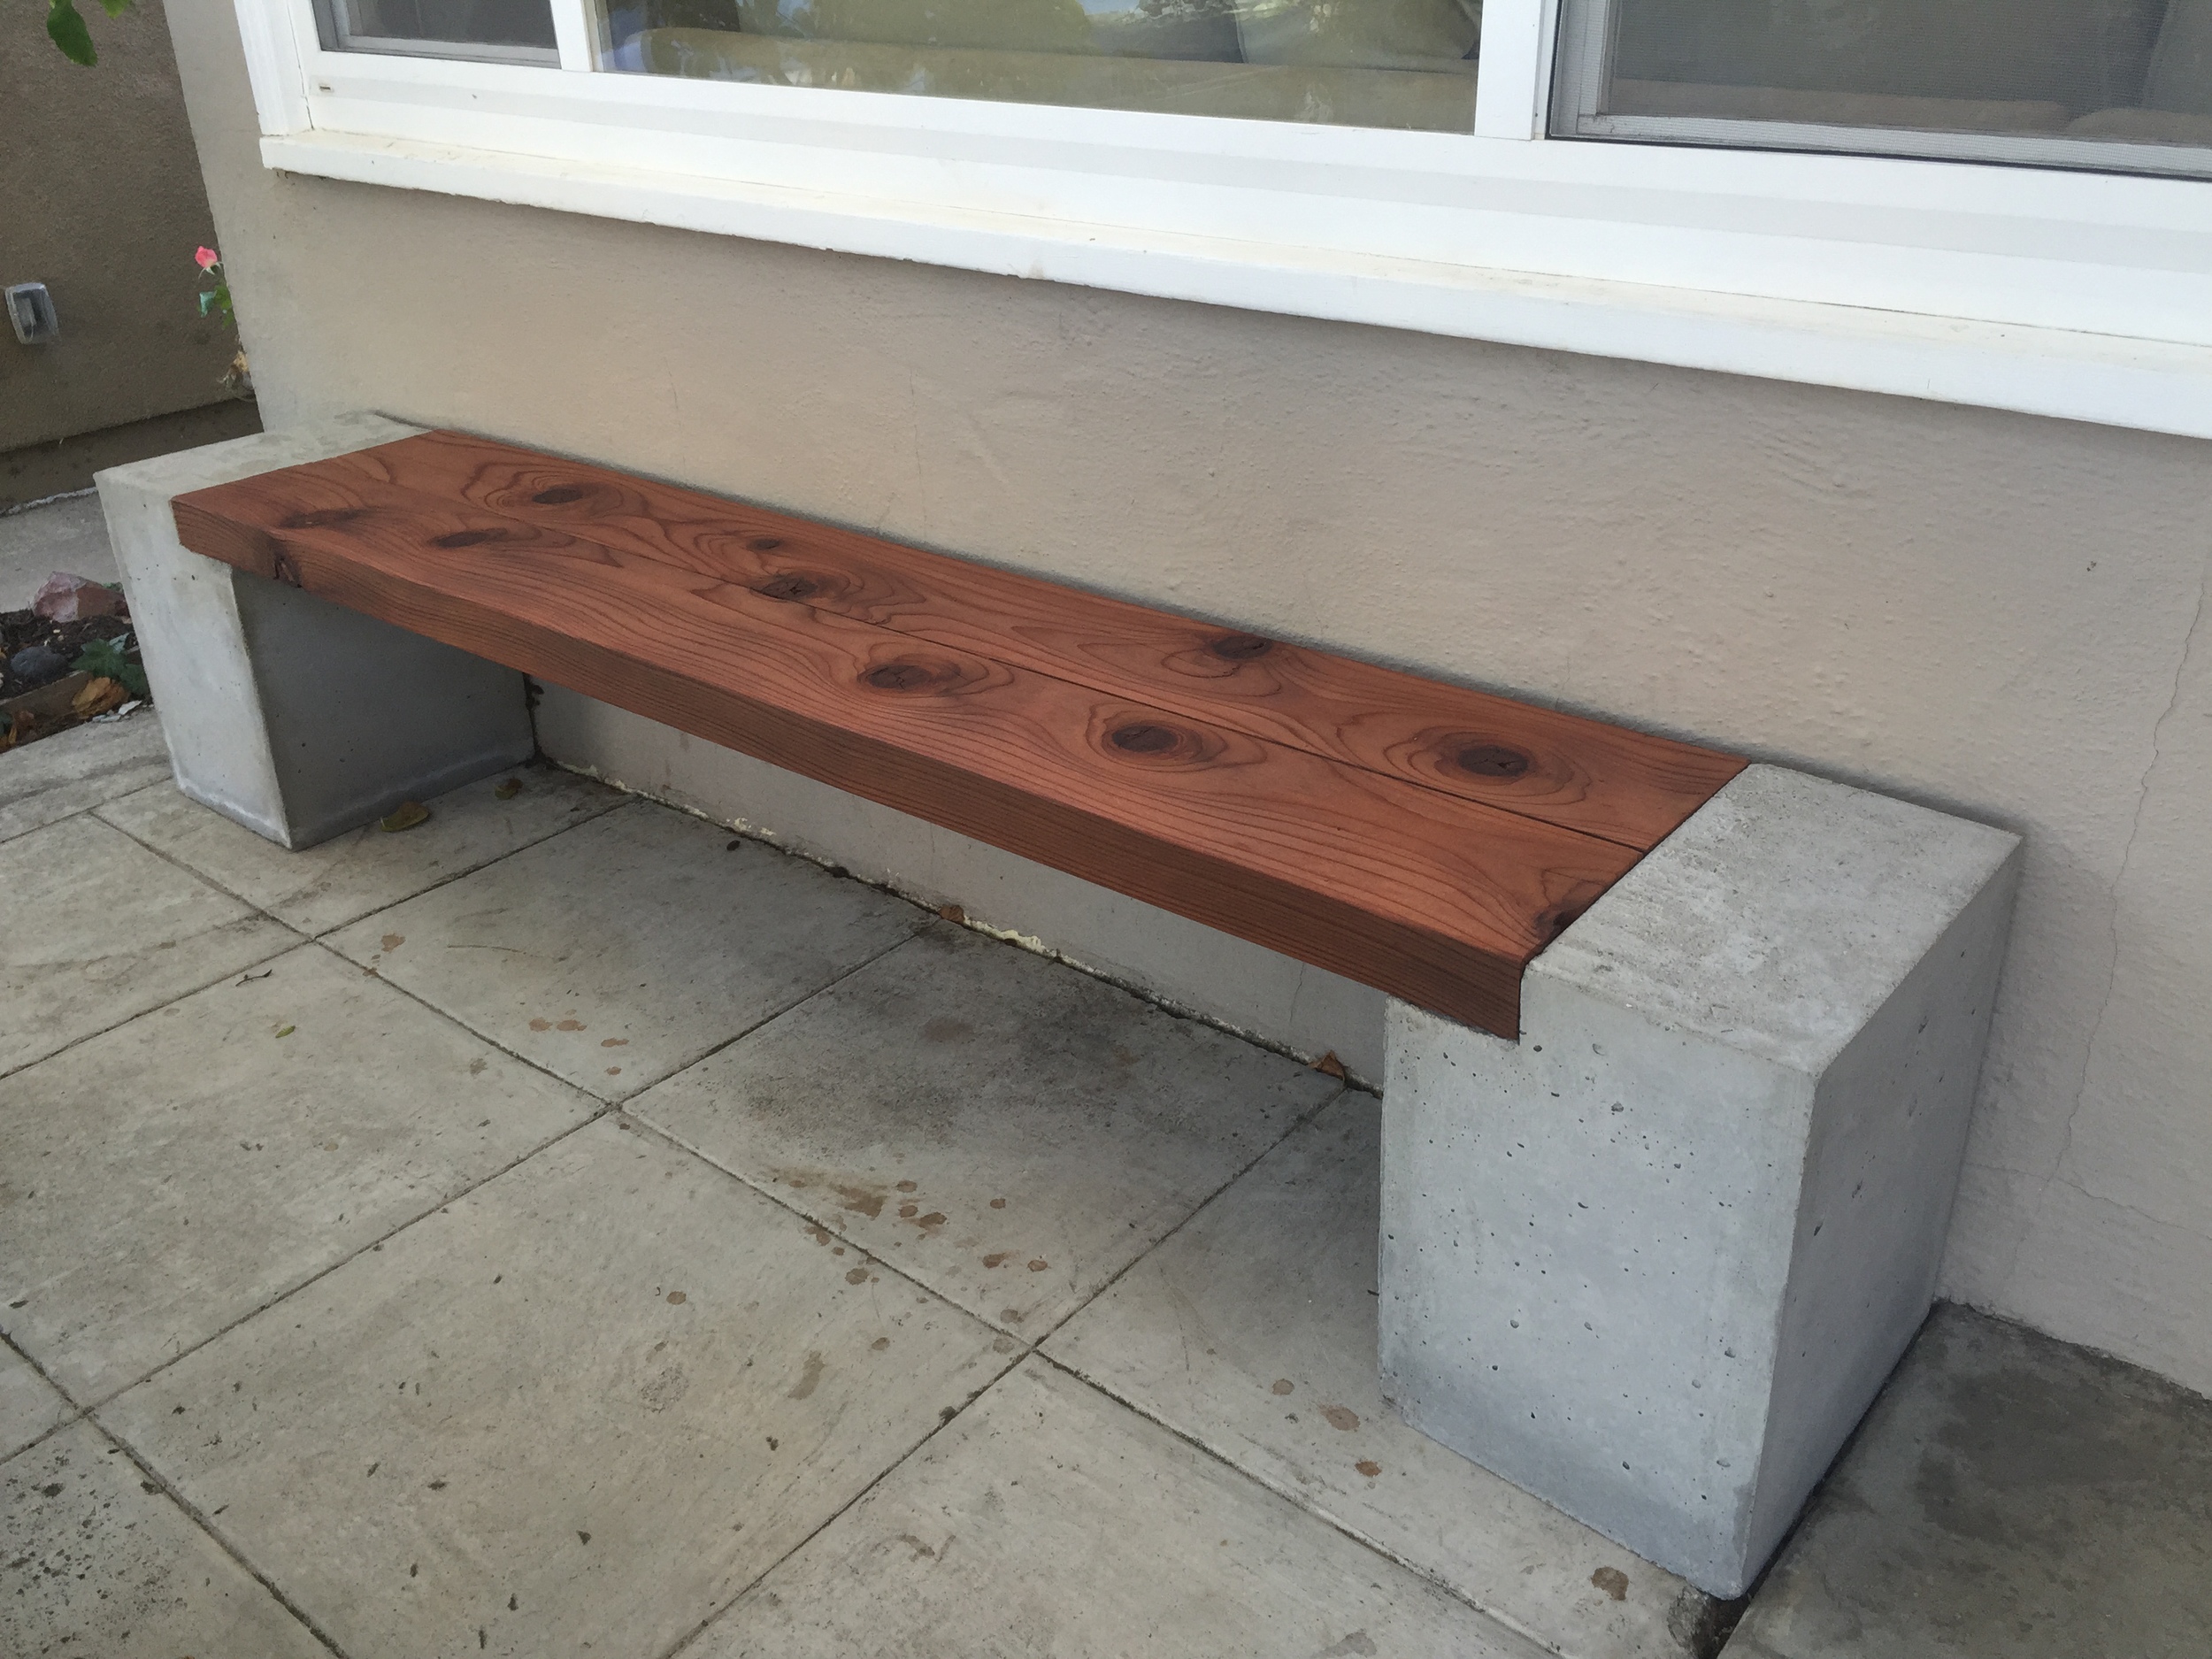
The completed modern bench
I recently spent a weekend building this modern bench. This outdoor bench is made of concrete and redwood, but any wood will work. The bench could be tweaked to whatever size you want or even turned into an awesome modern table. I decided to go with a 6 foot long bench with 8 inch concrete end tables built in. The total cost was ~$150 and it took about 8 hours of active work. This is a fairly easy project, but requires some muscle and the ability to cut fairly square sections of particle board. Below find a step-by-step tutorial and some photos and videos.
Step 1: Make your plans. The materials for this exact bench can be found here in case you want to make this exact bench, otherwise you will need to do a bit of math yourself. When designing the mold you need to account for the thickness of the lumber that will sit on top. My lumber was 2.5 inches thick and I left a bit of extra room. If I had to do it over I would leave a good quarter inch of extra room for the lumber as you can always raise the bench top up, but you do not want to chisel away concrete to get it flush if you don't leave enough room. Also keep in mind which pieces of board will screw into each other in your mold because you need to account for the thickness of the board. I used 3/4" board, so some boards needed to be 1.5 inches wider than the finished footing to account for the thickness of the boards they will screw into.

Step 2: Get your supplies. I got most things at Home Depot, but some things like special particle board screws and silicon sealer are cheaper on Amazon. You will need material for the frame (I used melamine coated particle board, but plywood would work if you want a wood pattern), concrete mix, styrofoam (optional but highly recommended), screws, wood for the bench and some wood to secure the pieces together on the underside, concrete sealer (optional), wood oil or sealer (optional). You will also need some tools like a skill saw or jig saw, tape measure, screw driver and drill and sand paper. The full list of materials can be found here.

Step 3: Cut pieces for the mold. Once you have your mold designed you will need to cut every piece out of the melamine coated particle board. Keep in mind that you want all surfaces that will touch the concrete to be coated or they will suck up the wet concrete leaving a funny pattern and ruining your mold. A scroll or skil saw is ideal for making these cuts, but other saws like the jig saw pictured will work too.


Step 4: Put the mold together. Using particle board screws screw the mold together keeping everything as square as possible. I used 3 screws to attach each piece together and made the gaps as tight as possible.

Step 5: Make the Styrofoam block. To save on concrete and to make your you footing lighter you are going to want to put something light and space filling in the footing. I used styrofoam insulation and simply cut out pieces 2 inches smaller on each side and top than the footing and glued them together with hot glue until they were the right height. Dry fit this foam block and then glue in to the bottom of the mold.

Step 6. Make the mold water tight. Using silicon caulking, put a bead on the inside of edges of the mold and wipe away the excess with a rag or razor. Make sure to force it into every crack and remove as much of the extra in order to get nice smooth corners.

Step 7. Add the divider. This is may be the most important step. This divider will determine how straight the bench sits. Take the time to position it correctly and make sure the melamine coated portion is facing down into the concrete.
Step 8. Clean it up. Remove any dust, syrofoam or junk that has fallen in. I used my leaf blower, but you can just turn it upside down and give it a good whack.

Step 9. Level it out. Find a nice level place to place your mold. If it isn't level now, your footing will never be square.
Step 10. Pour the concrete. I made a very watery concrete to ensure that I could work the bubbles out and make it more uniform. It took just less than two 80lb bags per footing. I added 4.8L of water per bag to get a consistency similar to chili. Once mixed, add a little bit at a time rocking or shaking the mold repeatedly along the way to work the bubbles up and out. Once you get to the bottom of the divider and feel good about the lack of bubbles, add in the top of the low side (what the wood will sit upon) and put something heavy on top. Continue to pour to the top of the mold and rock it for a while.

Step 11. Let it cure. Cover it with a bag to prevent crap from falling in and to slow down the drying process a bit. Come back in an hour and smooth it out if you need to. Then wait 48 hours for it to set up.
Step 12. Unmold the footing. Unscrew the screws on a side or two and unmold your footing. It will be pretty heavy, so you might need a friend to help.


Step 13. Repeat 4-12 to make an additional footing. You may not have to re-caulk it if things look good.
Step 14. Dry fit your bench top. I used 3" x 8" x 72" lumber. In reality it is more like 2.5" x 7.5" so you need to account for this difference. In these plans you will need two pieces of wood, although you could use smaller pieces or even one large wide pieces of wood if you can find it. Turn the wood over determining which piece and face looks best and will be the top part. Once you are happy with the configuration place it on top of the footing.
Step 15. Secure the bench top. I added two 2" x 1" by 12" pieces cut at 45 degrees on the underside of the two planks of wood to keep them together.

Step 16. Finishing touches. After the wood is dry, oil it up with some teak oil to really make the color and grain of the wood pop. Apply the oil, let it penetrate for 30 minutes and wipe the excess off. Alternatively, you can stain the wood and seal it with a waterproofing reagent. I used teak oil because I had it handy at it looks nice giving the wood a soft smooth finish. After a month, the concrete can be sealed if you want to give it a "wet" look.

The finished concrete and wood bench. Sleek, simple and modern and infinitely customizable to fit your taste.


